In today’s show you will learn how good of a camera is necessary to analyze your own tennis technique. Also find out how to best film your strokes, get the video to your computer, edit it, and share it with your friends or tennis pro. Definitely don’t miss this crash course in digital video for tennis improvement!
Download Transcript: Word Doc | PDF | Kindle | Text
Announcer: Welcome to the Essential Tennis Podcast. If you love tennis and want to improve your game, this podcast is for you. Whether it’s technique, strategy, equipment or the mental game, tennis professional Ian Westermann is here to make you a better player.
And now, here’s Ian.
[music]Ian Westermann: Hi, and welcome to the Essential Tennis Podcast. Your place for free, expert tennis instruction that can truly help you improve your game. Today’s episode of the Essential Tennis Podcast is brought to you by Tennisexpress.com.
On today’s show, I have a very special guest. It is Adam, from Fuzzy Yellow Balls.com, and we’re going to talk all about using digital video to improve your tennis game. Adam’s got a lot of insights about exactly how you guys can utilize video and use cameras and your computer and the internet and everything, to make your game better. So definitely listen. He give a lot of good information.
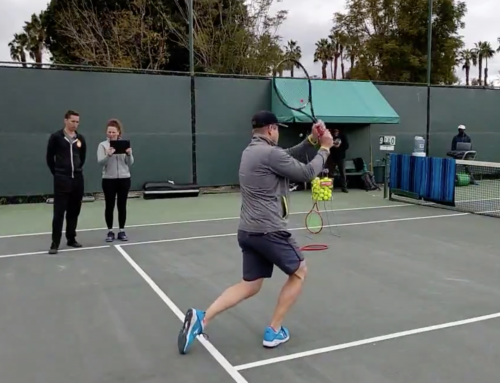
Before we get to that, I just have 2 quick announcements. First of all, I want to give a shout-out to everybody who came to the Essential Tennis clinic in Palm Springs, California this past weekend. It was an awesome time and those of you who attended, thank you guys, so much. You guys were an awesome group. Really good students, good listeners, hard workers, everything that’s I’m always looking for in tennis students. So I really appreciate you guys coming out. Those people were: John, from California, Shelley, from New Mexico, Zach, from Oregon, Eddie, from Utah, Dana, Brian and John, from Nebraska, and Andrew, from California. Definitely a big shout-out to you guys. Thank you guys, so much. I had a great time working with all of you this past weekend.
I also want to say thank you to everybody who has been putting reviews up on iTunes for the Essential Tennis Podcast and I’ll be sending out all those free sets of string in the next, probably the next week or two. Please be patient with me. I have a lot on my plate right now. I’ll definitely get those free sets of string out, but lots of kind words coming onto iTunes, and I really appreciate that. Everybody who’s written a review, thank you, very much. Alright, let’s get down to business. Sit back, relax and get ready for some great tennis instruction.
[music] [music]My guest today on the Essential Tennis Podcast is Adam Sieminski. He is the technical guru, and I guess you could say brains, to a certain extent, behind the technical success of Fuzzyyellowballs.com, also known as FYB on the internet. Adam, thank you very much for spending some time with me to talk about video analysis, taping our own strokes and the strokes of other recreational players. Thanks a lot for being on the show today.
Adam: Well thanks a lot for having me on, Ian. I appreciate it. I know I definitely think that there’s a lot that people can learn from videotaping their own strokes. Particularly comparing their strokes to a pro. A lot of people out there have never seen themselves on video, and I think that sort of what a lot of players see in their minds-eye as they’re hitting a stroke, sometimes turns out to be very different from what their strokes actually look like.
You know, I think it’s very valuable for people to see themselves and to be able to critique their own strokes as they see them. I think also video is just something that’s very intimidating for people. It scares people. It seems complicated, they’re not sure how to do it, it sound expensive, all that type of stuff. I think a lot of that is not really the case. Video is easy to do if you’re willing to dive in. It’s actually not very expensive, either.
Ian: Wow! I think a lot of people are probably really relieved to hear you say that because there definitely seems to be a large price tag on current, modern-day, digital camcorders that at least if you have the budget for it, I think a lot of my listeners are probably happy to hear you say that. It doesn’t have to be super expensive. We’ll get into all those things in a couple minutes. I actually want to hit on 2 other quick things, first before we really get into the meat of everything. First of all, I want to wish you a happy birthday, Adam!
Adam: Thank you! I’m 29 years old today. I’m getting up there! Which means I’m counting down until I’m 30 now, which you know, is a big step. But I’m OK. My dad called me today and said the same thing. But I’m confident in my age. I’m growing wiser over time.
Ian: That’s a good attitude. I’m actually going to be hitting 30 in about 7 months, so I’ll let you know how it goes. I’ll send you some tips.
Adam: [laughter] Great!
Ian: Secondly, I want to congratulate you, both you and Will, on the success you’ve had at Fuzzyyellowballs.com. You guys started right around the same time that I started Essential Tennis, and you guys have just blown up around the internet, and on Youtube and the video and the content that you guys are putting out is just second to none. I just want to congratulate you on how successful the site has been since you launched it.
Adam: Well thank you! What a long, strange trip. It’s been 3 years I guess now and when we started out we had no audience. Through hard work and some serendipitous mistakes I guess you could call them, we really found our niche, and we’ve been working at it ever since, so thank you.
Ian: I hope you guys continue to do great and you guys really do, I really believe, put out an awesome product. When I say product, I don’t even necessarily mean what you have for sale, but just the free video production stuff that you guys put out of professional strokes and recreational player strokes compared to professional strokes is a lot of good, free content. For those of you listening, it’s unlikely you haven’t been to Fuzzy Yellow Balls already, but if you haven’t, definitely go check it out.
Speaking of high quality production value, let’s go ahead and start getting into the specifics of shooting good, quality video. Let’s go ahead and start off with cameras. You made a statement in your introduction there, that it doesn’t have to be expensive. Please expand on that, because I know a lot of my listeners are probably waiting for you to tell them what they can buy that isn’t $2,000.00 that’ll still do a good job in showing them what they’re doing on the court.
Adam: Right. Well the first thing I would say is that technology is evolving so fast right now, that people would be really surprised at the quality of camera that they can get for very cheap right now. And yes, we shoot with cameras that are very expensive, and have a lot of accessories, but that is actually not necessary to get good looking or good quality video. Let me just start with the basics.
Most people nowadays, they’re wondering ‘OK. If I’m going to go film my strokes, where do I start?’ Well, a lot of people have a camera that’s built into their cell phone. A lot of cell phones nowadays can take video. Even the newer, the fancy ones can take HD video. My Moto Droid X shoots really high quality HD video. It’s super easy to just bring over to the computer and upload to Youtube. But a lot of other phones, even if it’s not HD quality, that’s certainly a starting point. If you’re just looking to see what your stroke looked like? Point your cell phone camera at yourself. That’s absolutely free and it may not be a stunning looking picture, but you will get to see what your strokes look like.
By the same token, a lot of people have digital still cameras. Kind of pocket sized, point and shoot digital still cameras and most of those cameras have a built-in movie mode. Those cameras will certainly have a higher quality picture. You’ll get to see a little bit more with a point and shoot camera’s movie mode, than you would with a cell phone camera. Let me expand on that a little bit further.
One of the things that’s very important to being able to capture video of your strokes that’s going to help you, is being able to control the shutter speed of the camera. This is a little bit of a technical detail, but the shutter speed is the speed at which the camera takes a picture. A movie camera, or a video camera will take nearly 30 pictures per second. It plays those pictures back at 30 pictures per second and it looks like motion to you.
But the key is being able to control how long the shutter of the camera stays open during each exposure. So even if the camera is shooting, say, 30 pictures per second, each exposure is not necessarily 1-30th of a second. In fact, 1-30th of a second, it would be a very blurry picture when you looked at that, especially if you’re trying to capture something fast moving, like tennis If you’re able to control that shutter speed, and have the shutter only open for 1-1,000th of a second instead of 1-30th of a second, then you will get a sort of more frozen look in each frame of the video, which is very important. It won’t be blurry, is basically the bottom line.
What I was essentially getting at, was generally with [empty] that you have over elements like the shutter speed. A cell phone camera, I don’t think there’s a single cell phone camera in existence, for instance, that has the ability to set the shutter speed, manually. But a lot of point and shoot kind of pocket digital cameras will have that ability. Certainly as you get more expensive cameras down the line, those will have that ability, as well.
But being able to control the shutter speed is not something that is required to be able to see your strokes, but it’s certainly something, it’s like one of the key elements, I would say, that will allow you to get a lot more out of watching your video, when the action is actually kind of frozen in each video frame, rather than being blurred.
Ian: Yeah, I know what you’re talking about. I’ve had quite a bit of experience using flip-cams, which are pretty inexpensive HD video options. They don’t have an option to control the shutter speed. Just as an example of what you’re talking about, when I shoot outside in direct sunlight at 30 frames per second, it’s nice and clean and crisp. Each frame is nice and frozen, as you said. But when I go inside, it becomes very blurry. Is that because it makes automatic adjustments based on how much light is available?
Adam: That’s exactly correct. That shutter speed adjustment is happening but the camera is controlling it. The camera tries to control the amount of light that’s coming into the camera, so that the scene doesn’t look blown-out, like too much light. It’s called over-exposure. Too little light is called under-exposure. So the first thing that the camera will adjust is the shutter speed when it’s trying to figure out how much light to let in.
So generally, if you’re outdoors on a very sunny day, there’s a lot of light coming into the camera. So the camera can’t leave the shutter open as long, or else it will be over-exposed. Generally, if you’re outdoors shooting on a sunny day, a camera with an automatic shutter control will actually give you a pretty short shutter time. 1-1,000th of a second, 1-500th of a second, somewhere in there. I guess that one of the small technical details of it is why don’t all cameras, whether it’s a cheap camera or an expensive camera, why don’t they all just have a fast shutter speed? I mean why bother with a lower shutter speed, right? Why not just freeze the action on every frame?
The answer is that the human brain actually doesn’t really like watching video that’s shot with a very high shutter speed. To the brain, it looks like the picture is jumping, basically, if every frame is frozen. For most applications, not many people probably are shooting sports video exclusively, with their camera. So the designers of those cameras try to make the video look as good as possible if you’re shooting a wedding or your kid’s graduation, something of that nature.
Ian: I didn’t know that. That’s interesting. Alright. Let’s say that my listeners want to get kind of an entry-level camera that allows them to have that control over settings such as shutter speed. What kind of budget are we looking at? Or what kind of cost are we looking at to get a camera that just I guess, spend as little as possible but still have the ability to control and fine tune those settings to make it as good as possible.
Adam: Well, what you were talking about, the flip HD camera, I think is right around $200.00, and that doesn’t have the shutter speed control. I think the one-step up from that would be, you and I had actually talked previous today about looking at some cameras that would be good for filming tennis video, and we found, or you found, I should say, a great kind of camcorder style camera for right under $300.00, that actually would do everything that you needed including the ability to control the shutter speed. It has a very high frame rate, so it’s actually kind of a slow-motion camera as well, which a lot of people will find very helpful. That camera was a Sanyo camera. S-a-n-y-o, and I can give the model name for your viewers that we had looked at before.
But I’m a fan of this camera based on its features, and the fact that it’s HD. That model number is V as in Victor, PC-FH 1A. If you’re users type that into, say, Amazon or Google, that camera will come up. It’s a very cheap camera. $300.00 is the very low end of what you would expect to pay for an [noise] HD camera that you can control the shutter speed on. That will shoot slow-motion video as well. That’s a fantastic camera.
Ian: I’ve been really happy with it. Especially for the price and it took me dozens of hours of Google searches to find that camera around where my budget was, and trying to find the features that I was looking for. But yeah, it does 1,000 frames per second at a full 10-80P video resolution, which, for $300.00 I think is outstanding.
Adam: Yeah, that’s amazing. The other camera that actually we have used in the past at FYB, is called the Casio Exilim Camera. I think that’s spelled e-x-i- l-i-m, Exilim? That camera is more of a point and shoot kind of style of camera body. It’s not a camcorder where you hold the camera on the right side of it I guess, and you look through the viewfinder in the back. It looks much more like a photographer’s camera.
But that camera will also shoot HD video. It will shoot up to 60 still pictures per second, which is actually a really nice feature if you want to record some high quality still pictures and get exactly the right shot. You can have that thing take 60 pictures in 1 second, it’s just fantastic. It’ll record HD and it’ll record up to, I believe, frames in a second, which is very slow motion. That camera, I think, comes in around $300.00 as well. At that low price point you actually can get a whole lot of bang for the buck, basically. There’s a lot you can do with a cheap camera.
Ian: Nice. Let me make a correction on something I said a second ago. The Sanyo, I said 1,000 frames per second. That’s not accurate. It does 60 frames per second and full HD 10-80P resolution. That is my bad!
So moving on. Let’s say that we’ve got our camera now, at either an entry level digital video camera using our cell phone, or just maybe a flip- cam for $100 or $200 bucks, or maybe even something a little bit more customizable and a little bit higher quality. Once we have the camera and we go out to the courts, and we want to actually capture our strokes, can you please talk to my audience a little bit about what’s important to capturing a video that’s best for analyzing. Meaning that I guess we could talk about maybe the use of a tripod and how to frame the subjects. Tips like that. What can my listeners do to create the best quality, I guess production value, for their own videos?
Adam: Sure. I’ll run through a little bit of list that I have that I think is kind of important stuff that will really cause people to get a lot more out of their video. You know the first thing is, most people do simply walk out to the court. They put their cell phone camera on the bench that’s right there at the net and they point it at themselves, and then they go. That’s certainly fine. That’s great, that first step. That’s the first step. Just getting out there and getting yourself on video. Then put that up on Youtube and get people to critique it and all that kind of stuff. How do you up the quality? What are really simple ways that you can get more out of your video?
The very first thing, the very, very first thing that I’m going to start with, is get yourself a tripod. And I know a lot of people out there are thinking to themselves ‘Oh, a tripod is like this huge thing that I don’t want to go buy for $100 bucks. I have to bring it out to the court, it’s got it’s own bag.’. all that kind of stuff.
Just 2 things. You can go to any photography store or any store like a Best Buy, Circuit City if they still exist; I don’t remember. There are very tiny tripods called baby tripods, that are 5″, the legs are 5″ long, and then up at the top, there’s the screw that screws into the bottom of the camera.
Usually, the baby tripods, you can get them and they have what’s called a ball-head, which is sort of the head that sort of freely rotates around where it screws into the camera. These tripods are $10.00. I’ve seen them for $10.00 at a local electronics store. The reason that I just very, very highly recommend that people pick one of those up, is that when you level the camera, so the camera is not pointing up at the sky when it’s supposed to be pointing at you, that makes a tremendous difference in how much you can get by looking at the video. It’s so, so easy to do. $10.00 for that little tripod.
Then you can actually set the camera on the bench and you can rest-assured that the camera’s actually level and pointing at you properly. You definitely don’t have to splurge for something super expensive. The other really cool thing that I would recommend is what’s called a gorilla-pod. That’s a mash-up between gorilla and tripod, I guess. It is a [inaudible] tripod that has flexible, but strong legs, basically. So you can curve the legs of the tripod or have the tripod grip onto something, basically, with the curved leg.
Which is actually really great for you can latch the tripod onto the back fence of the tennis court, or onto a railing if there isn’t anywhere else to set the tripod if you don’t want to put it on the ground. Gorilla-pods are also really cheap. It’s just something that can help you take the video to the next level by giving you a different angle, or being able to attach the camera to the back fence or something like that. That’s #1. #1 step to improving your video quality? Get a tripod. Tripods are not expensive. They’re $10.00, $20.00. Anything more than that, you might be wasting your money, initially.
The second thing, and this is also something I see a lot is the framing of your shot. How zoomed-in or zoomed-out are you? That’s another thing that scares people. A lot of people are hesitant to zoom the camera in because they fear that the camera won’t capture what they’re doing on the court, if they’re too zoomed in. So what you see a lot of, if you look at people’s tennis video on Youtube, is just the camera is fully zoomed-out from the net and the player is like, an inch high. They’re tiny, tiny, tiny. It’s OK to zoom in.
The reason you want to zoom in is because the more zoomed-in you are on yourself, the more you’re going to see of what you’re doing. So I would really encourage people to play around for even 5 minutes, with their camera on zooming-in and maybe zoom-in closer than you think you might want to, to try to capture that one shot the best that you can on film. So zoom is important, and framing is important. That will actually show you a lot more when you’re not a tiny little dot in the picture, and you’re actually large and in charge on the screen and you can see what you’re doing. That’ll help people a lot, as well.
I think the third thing, so we have get a tripod, don’t be afraid to zoom in, and then the third thing is get the angle right. What angle do you want to shoot yourself at? Where do you want to place the camera on the court to get what you’re looking at? Some people sort of just elect to, like I said, put the camera on the bench there, and then just let it shoot. That’s perfectly fine. That’s what you would call a three-quarters perspective, where the camera’s not quite head-on facing you, and it’s not quite to the side. It’s kind of shooting from a three-quarter angle. That’s certainly an angle that you can learn a lot from. You can see the whole stroke, etc., so that’s not a bad angle.
What people shouldn’t be afraid to do, is play around with looking at different angles of filming yourself from. Let me give you an example. On the forehand, right, you want your contact point on your forehand to be a little bit out in front of your foot. Right? So out in front of your body. A little bit in front of your foot, ideally. A lot of players certainly have trouble rotating back toward the net, so they end up making contact with the tennis ball, in line with their body, rather than a little bit out in front of their body. Exactly how far out in front of your body you’re making contact with the tennis ball at, is hard to tell from a three-quarters shot, or from a head-on shot.
So what you might want to do is look directly from the side. Shoot, looking down the baseline, then you’ll be able to see exactly where your contact point is, from the side perspective. That’s something that a lot of people don’t do. Another super useful angle is of course, the back angle. The sort of the TV angle. That lets you see the whole court. It lets you see your strokes from behind. It lets you keep track of your footwork, and sort of [noise] sorry. The back angle, from a brain perspective, helps you identify with what you’re seeing. Anytime that the camera is behind someone, it’s much easier for people to put the, for the viewers, to put themselves mentally, in the players shoes, if that makes sense. Sort of you’re seeing from behind them. It usually makes sense to people, more so than shooting from the side or from the front. That can be a very useful angle, as well, when you’re trying to figure out what you’re doing right and what you’re doing wrong.
Ian: OK. Awesome! Good stuff. Next, I want to move on to one more main topic before we run out of time. That has to do with editing software, and actually working with the video files. So once our listeners have gone out and gotten whatever camera they’re going to use and they’re using their tripod, they’re framing themselves correctly, they’re positioning the camera in the right spot, and they’ve actually taken that footage, what do you recommend, Adam, as far as looking at it, past that? In other words, transferring it to the computer. Is there certain software that you recommend to be able to view video in slow-motion, or frame-by-frame, that sort of thing? What do you think?
Adam: OK. I’m going to jump right into that, but there’s one other thing that I wanted to mention really quick, about making your video look a little better and getting a little more from it. And that is a very simple thing that you can do. Make sure that you are frontally lit. Or that you are lit properly by the sun when you’re shooting. This gets into something that in photography is called back-lighting. What you don’t want to do, and I wish I could kind of draw a simple diagram, is, you want the camera to be on the same side of the player as the sun. So if the sun is in the southern sky, and you are playing, you want the camera to be pointing at the side of the player that is lit by the sun.
Let me give you an example. What you wouldn’t necessarily want to do or what will certainly make your footage look a lot better, is imagine if you are playing with your back to the sun. You don’t want to be shooting at the front of you with the camera, because the back of you is lit by the sun, and the camera will cause you to basically completely black-out. It won’t pick up any details because you are creating shadow with yourself, from the sun. If your back is to the sun, make sure that the camera is behind. If the front of you is facing the sun, then have the camera in front of you. That’s not required. You can certainly shoot a shot that’s back-lit. But it will definitely take your video to the next level, also, just being conscious of where the sun is when you’re shooting yourself.
Ian: Good stuff! You should teach a photography class, Adam.
Adam: I’m thinking about it, you know. Maybe I’ll set it up on the website. So let’s jump into your other question. How do you edit this stuff? How do you get it onto the computer? How do you edit it? How do you look at it? Is that expensive? Certainly the video software we use is $1,000.00. You don’t want to do that. You want it to be free, or very cheap. Starting with how do you get it onto the computer?
Most cameras nowadays are very straight forward in that when you buy the camera, there’s either software that comes with the camera in the box, or you simply just plug the camera into the computer with the USB cable. It opens up the transfer wizard, is I think what it’s called on the computer when you plug the camera in. So that’s very straight forward. You burn the video clips over to your computer, and gone are the days where your video was on tape, and then you had to transfer the tape to the computer. We still sometimes do that.
But whether you’re shooting on a cell phone camera, particularly if you’re shooting on a digital still camera, if you’re using it in movie mode, or if you have that Sanyo camera or the Exilim camera that we were talking about. All those cameras, you take the USB cable and plug it into your computer, exactly like you would do if you were transferring digital pictures from your still camera. It works exactly the same way. Once you get the video, you copy the video clips over to your computer. What do you do now? How do you edit them?
The first question is, exactly how much editing do you actually really need to do? If you want to watch the video yourself, and you don’t want to send the video up to Youtube, you actually probably don’t need to do really any editing at all. You can leave the video files just as they are. What you’re more looking for at that point, is the availability to go frame by frame through the video.
Unfortunately, back in the day with the computers, say back in the 1990’s, Windows Media Player, the free media player that was included with Windows, and is still included with Windows, they removed the ability with Windows Media Player to go frame by frame through a video. You can no longer do that. Why that removed that ability, I don’t know.
But the good news is, the program that I use personally, to go frame by frame through video is a program called Media Player Classic. If you Google for Media Player Classic, a whole bunch of downloads will come up. It’s a perfectly safe program. It’s a very small very lightweight video viewing program, that allows you to go frame by frame. Actually the Media Player Classic, it was created and was designed as a reaction to Media Player becoming too bloated, and removing the features that people really want. Like being able to go frame by frame.
So that program is 100% free, very easy to use, very quick to download and you just open up your video files using that. Then the left and right arrows on your keyboard give you the ability to go one frame forward or one frame backward. Very, very simple. So that is the first thing I would recommend. If you don’t even want to edit your video once you get it onto the computer, just pull it into Media Player Classic, and go frame by frame.
Ian: By the way, for my Mac listeners, Quicktime does the frame by frame with the arrows, like what Adam has been describing.
Adam: Exactly. That’s what I was going to say. Or even if you’re a PC user, you can download Quicktime as well for the PC. And if you already have Quicktime? Great. You can open up your videos in the Quicktime player. It’ll do exactly the same thing. I guess I’m just partial to Media Player Classic. I love that program. So if you actually do want to edit your video, or if you want to send it up to Youtube for instance, I would recommend sticking with the free programs that are already included with your computer.
If you are Windows user, there is a program called Windows Movie Maker, that’s included with Windows, and it’s completely free. If you are a Windows user, you can click on your start menu, and you would go to programs, and then the accessory menu, and you should find Windows Movie Maker, there. If it’s not right in that main list, it might be under entertainment or multi-media, whatever the case may be. But it’s in there. Or look for it on your programs menu. And if you’re a Mac user, there’s iMovie. I’m not a Mac user, but I imagine I-Move is pretty straight forward to find. Macs are pretty easy to navigate. So that would be the program you’re looking for there.
The purpose of editing a video, generally 90% probably of what people want to do when they edit a video, is clip out the dead space at the beginning. You know, pressing record on the camera and then walking out to the court and then hitting. So they want to cut out the dead space or they want to cut out bad shots, or they want to cut out the good shots so they can upload only the good shots to Youtube. Or show them to their family and friends, or their coach, I guess.
Most of what people want to do is cut or crop, I guess you could say. That’s very easy to do with both of those programs. With I-Movie and with Windows Movie Maker. Then of course, after you’re done with the simple editing, and you can also, in those programs, you can level the video. You can rotate the video in those programs, so that if the camera wasn’t quite level when you filmed, you can go in and rotate the video so that it becomes level, in the editing program. That’s another big thing that I do quite a bit. And what else?
So the last step, I guess, is get your video online or share your video with people. The simplest way to do it, of course, is Youtube. I highly recommend Youtube. It’s so easy to use. You go to Youtube, you create an account with them, you upload your video, and Youtube handles all of the coding, basically, taking your video from whatever format your video camera shot it in, into being able to share it with everyone. That’s fantastic, because once it’s on Youtube, anyone in the world can critique it.
You can just, if your coach want to take a look at your strokes, you can just send him a link to your Youtube video, all that kind of stuff, in an email. That’s very powerful and that’s something we haven’t seen before. You’d be stunned at how many, if you searched for “my forehand” on Youtube, you’d be stunned at how many people’s forehands are up there on Youtube, waiting to be seen.
The other thing is you can certainly take your videos once, if they’re edited up, and you can put them on your cell phone. So you can take them and show your friends your forehand on your cell phone, that kind of stuff too. Which is all cool. Put it on your video iPod. That’s another big one. So, yeah. Tons you can do with video now.
Ian: Or compare their technique to that of the Pro’s on Fuzzy Yellow Balls, right?
Adam: [laughter] Well thank you for leading me very promptly into that! I actually did want to mention this, and thank you for bringing me back to that. One of the really big things that people can learn a tremendous amount from, is split-screening themselves, side-by-side with a Pro. Or, watching how a Pro executes a stroke, and then comparing that to their own stroke. You know, we have a ton of clips. Well, almost 1,000 clips now, but certainly 100’s of clips of Pro players from Indian Wells, hitting their shot. Like their forehand or backhand.
We have people like Roger Federer or Nadal, or Tommy Haas has flawless technique. I really actually like his forehand. Or on the ladies side, we have Ivanovich and all these other top Pro’s up there. You can open up a Youtube widow with the player with whatever player you want. You can look at that and then you can open up say, Media Player Classic, with your own strokes, and you can compare side by side, yourself with a Pro.
It’s actually very interesting because what we have found, and we have a course on this, if people haven’t seen it already, I really highly recommend that people sign up for this course. It’s free. It’s about 45 minutes long, but we show you exactly what separates amateur players from Pro players using video. In that course, we look at 3 different amateur players. One is a very beginning player, had played about a month or two. Another guy was a little better. Then we had someone who had played in high school but was looking to improve. What we saw with all of those people, when we looked at their strokes on video and we split-screened them, side by side with a Pro player like Tommy Haas, it’s actually very stunning what the differences are. And it turns out that a lot of players are doing sort of very basic things. Very basic elements. I guess we call them the fundamentals?
But that I think is really where video shines, is the ability to go out and capture your own strokes and then compare them to something like the fundamentals. What are all the Pros doing the same? What am I doing or not doing when I hit a forehand or a serve or a backhand? That, I think, is very powerful. I think that’s really where video shines and that’s what people should be trying to do is get out there. Take a risk. Take your cell phone camera, your still camera, your cheap video camera to the court. Shoot some video of yourself, and then look at yourself side by side with a Pro. If you can get over how good their strokes look in comparison to yours, there’s really a lot that you can learn from doing that. I think it’s a tremendous resource for people and it’s something that was not doable, or extremely hard to do even 10 years ago.
Ian: So how can people access that free instructional video?
Adam: If they go to Fuzzyyellowballs.com, I think we have a sign-up box that’s right on the right hand side of the website. I think the website is going to be redesigned as well, pretty soon, so it might just be a big honking box right at the top of the website that says ‘Sign up for our course.’ You can get it there or go to our website and click on the Pro-strokes Library, right up at the top. That’s where all of our Pro player footage is. There’s tons of stuff in there. There’s 100’s of hours, probably of footage in there of Pro’s hitting in slow-motion high def. It’s great. And it’s all free. Take a look.
Ian: Awesome! Well, I know that just like myself, I know that my listeners are going to find it really obvious why Fuzzy Yellow Balls has been so successful. It’s easy to tell that you’re really passionate about this stuff, and really creating the best possible video experience that you guys can. Adam, I want to thank you for spending the time with me to share some of your knowledge and what you’ve learned about creating great quality video. And using video in general to help improve the games of tennis players. Thank you so much for everything that you’ve shared today.
Adam: Absolutely! Thank you for thank you very much for having me on. I’m glad I got to share with your listeners. To all of your listeners, I would say good luck with your video. I can’t wait to see the improvements that you’ve made. [inaudible] Thank you Ian.
[music] [music] [music]Ian: Alright. That does it for the Essential Tennis Podcast, episode #143. Thank you very much for listening to today’s show, and I hope you enjoyed my conversation with Adam from Fuzzy Yellow Balls. That does it for this week’s show. I’ll go ahead and wrap up. A little bit longer episode this weekend, and I hope you guys have enjoyed the extra information. Again, a thank you to Adam for spending the time with me and sharing his knowledge with us.
Alright, so I will talk to you guys next week. Until then, take care and good luck with your tennis.
[music] [music] [music] [silence]